Introduction
CHAT is Columbia University’s advanced AI chat platform, developed to provide the Columbia community with flexible and powerful generative AI capabilities. With CHAT, users can customize AI agents, personalize their interactions, and tailor the platform to meet a wide range of academic and professional needs.
The platform is designed to support effective AI-driven solutions for both individual and collaborative work. Users can rely on CHAT to perform various language-related tasks including, summarizing complex information, translating between languages, and engaging in dynamic conversation. Whether you are a student, faculty member, or staff member, CHAT makes it easy to integrate advanced AI tools into your daily activities, enhancing productivity and streamlining communication.
For additional information about CHAT, please visit our service page.
CHAT User Interface
The CHAT interface is divided into several key sections to help you navigate and use its features efficiently. Each area of the interface is designed for a specific function, whether it’s starting a new chat, switching AI models, managing files, or adjusting your settings.
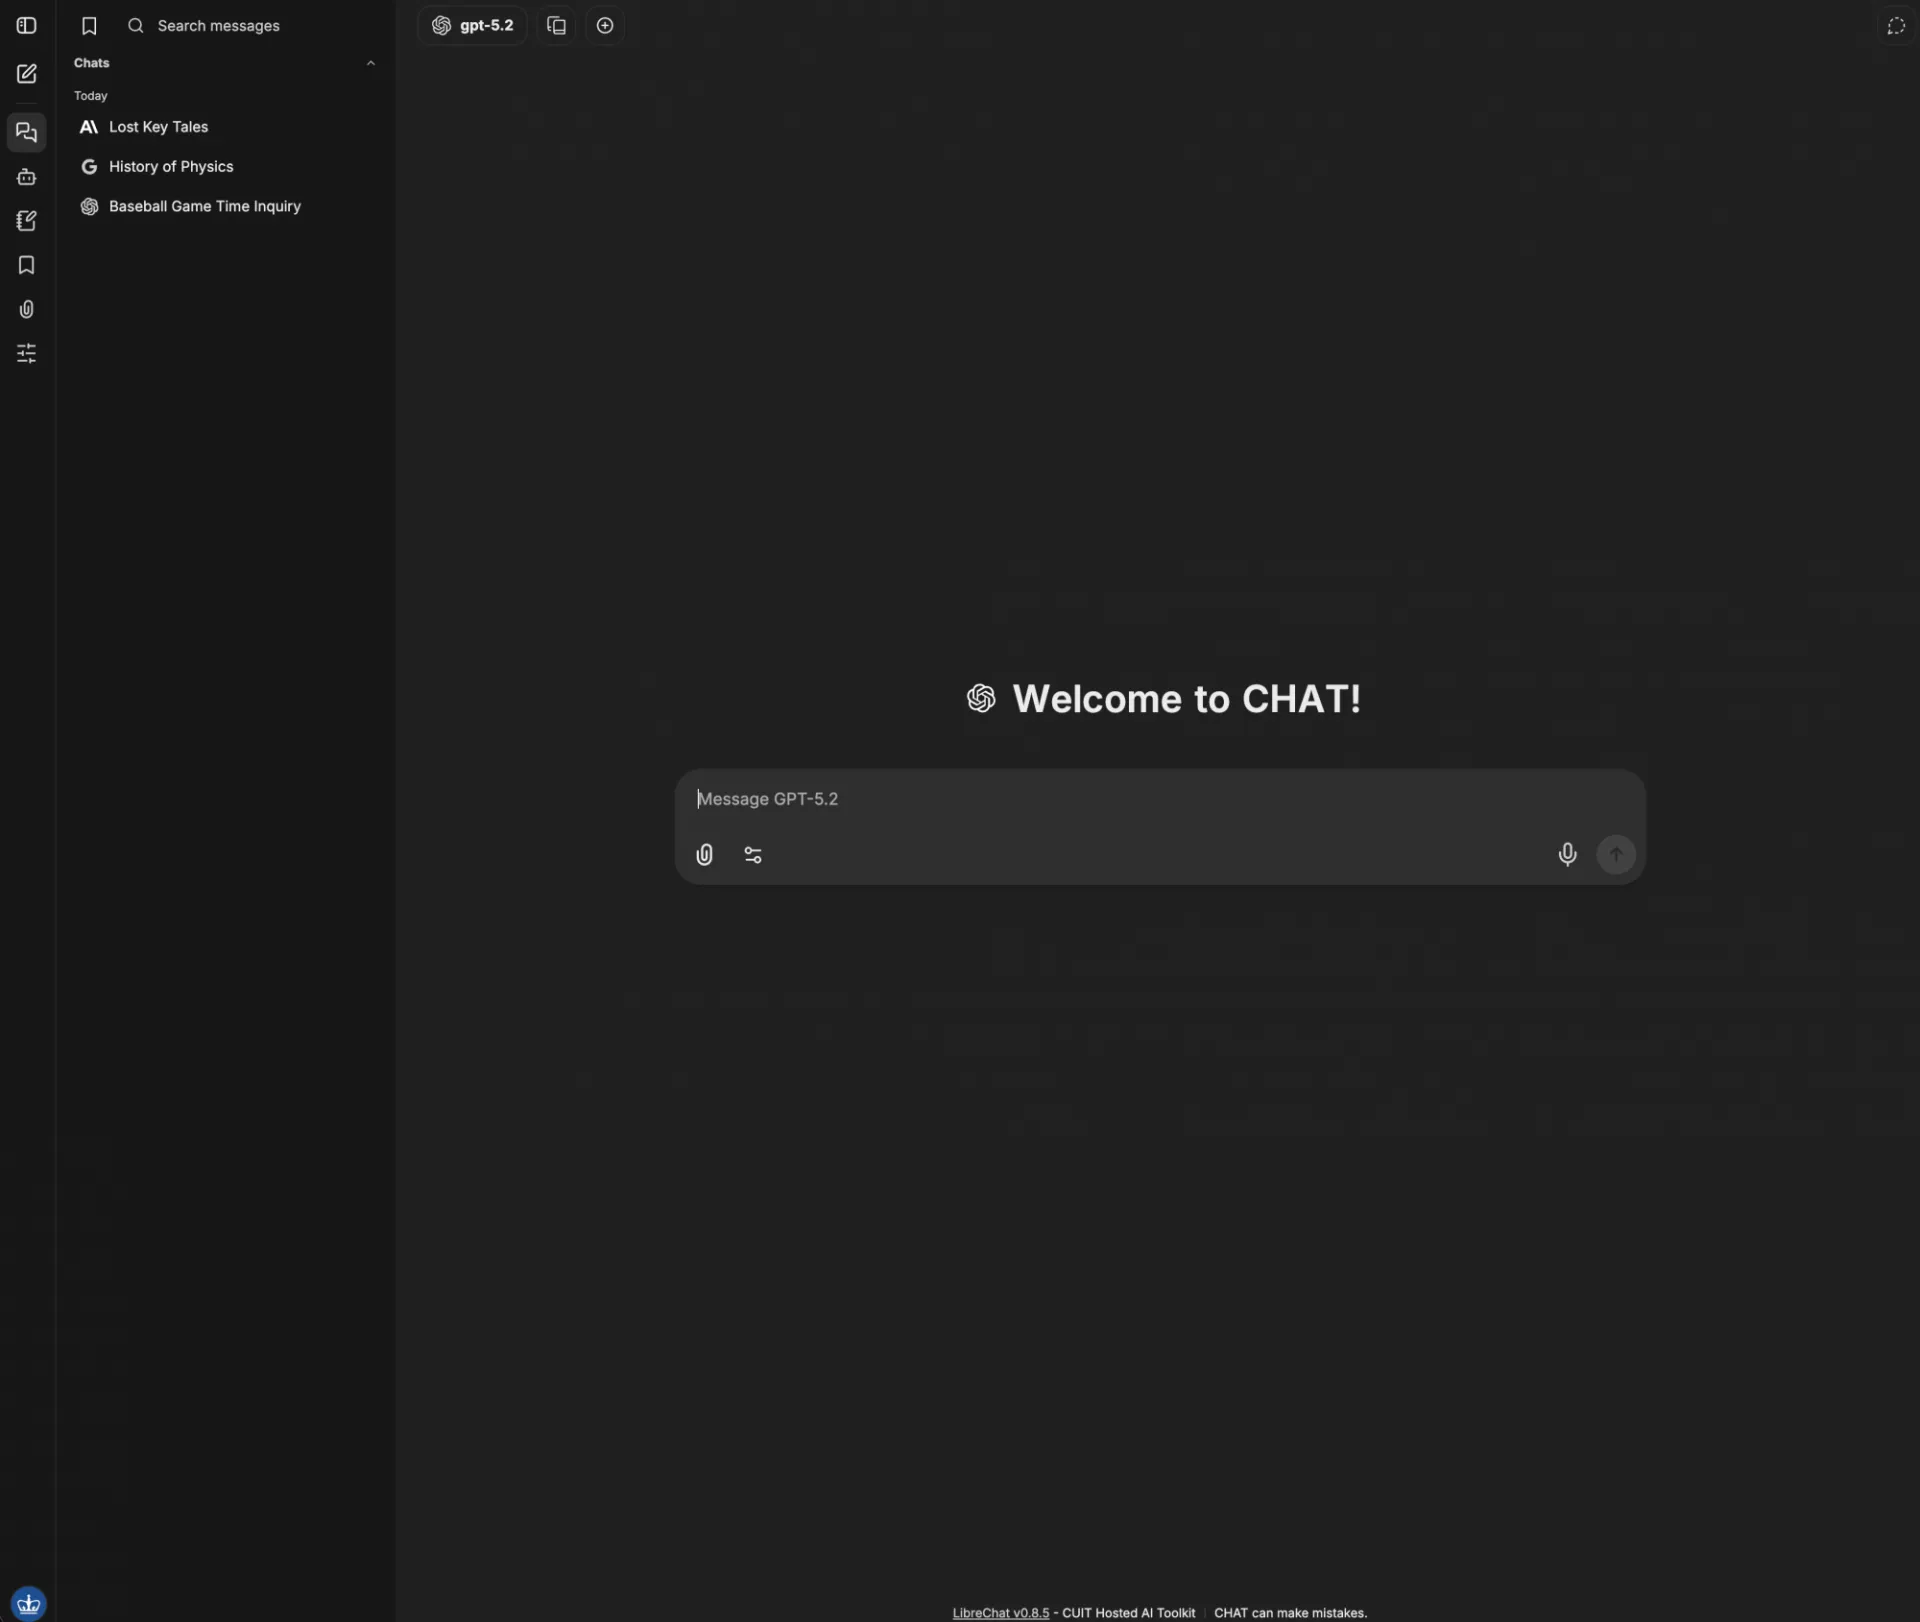
Main Chat Window
This is the primary space for interacting with CHAT. Type your messages and attach files in the input box at the bottom and CHAT responses and interactions will appear in this main area.
By clicking the “Microphone” icon, users will be able to use voice to text to fill in the text box. When clicking the “Speaker” icon next to any entered query or response, CHAT will read the text out loud using the selected Voice in the settings.
Model Selection Dropdown
Select which AI model you want to use. Users are also able to switch between available AI models in a single conversation. Users are able to select their own Agents built with the “Agent Builder” tool.
Within the Model Selection Dropdown, users will be able to “Pin” their favorite models. Pinned models will appear under the search bar in the Chat History section
Columbia users have access to two pre-built agents under the “Agents” section of the Model Selection dropdown. These agents include OpenAI Image Generation and Web Search functionality.
Features Panel
Access additional tools and options:
Chat History Window: Users can choose to show or hide their Chat history window or any other window selected from the features panel.
By clicking on the three dots next to the chat name, users can re-name, duplicate, archive or delete chats. They also have the ability to share the chat conversation via URL with other users.
- New Thread: Opens a blank chat, clearing the current conversation showing in the Main Chat window.
Agent Builder: The Agent Builder allows users to create custom AI agents using any of the available models in CHAT. Currently, sharing custom agents with other users is not possible.
To create an agent users will first need to give the agent a name, then select the provider and model they would like to use. Once a model is selected the parameters will appear that can then be customized (similarly as when editing in the "Parameters" tab). Clicking save will bring users back to the main agent builder menu, where they can then add a description, custom instructions or tools like "Google Search" or "Image Generation" to the agent. (Note: Tools work even if not using that provider. For example OpenAI models work with the Google Search tool)
If users want to upload files for the agent to use, they must enable "File Search" in the agent settings and then add the file in "Upload for File Search".
Once an agent is saved, it will appear in the Model Selection Menu under the "Agents" provider in addition to the two Columbia Agents.
Prompts: allows users to create pre-made prompts that can be quickly selected and loaded into any chat. Similar to the "Attach Files" tab, when first selected it shows only existing prompts, a search bar to filter created prompts, and buttons for "Create Prompt" and "Manage," which take users to the prompt creation screen
When creating prompts, users will be able to include custom variables with curly brackets or special variables from the dropdown menu. Users will also be able to label their prompts in the top right hand corner and these labels can be used for filtering. Once a prompt has been saved users can open the "Advanced" menu which will also show version history and the ability to select which version is being used
Bookmarks: This tab allows users to manage their created Bookmark groups. Users can create a new Bookmark group with the "New Bookmark" button, which allows them to name the group and provide a description. Once a group is created, users can see the title, the number of bookmarked threads, and the option to edit / delete the group.
Note that this section only manages the Bookmark groups. To add an existing chat to a group click the bookmark icon in the Main Chat Window then select the group(s). Similarly, you can filter your chats in the Chat History section by using the Bookmark icon and then selecting the Bookmark group.
Attach Files: Once a file is uploaded in CHAT, it is added to the user's "Attach Files" tab. This allows the user to quickly select files to add within threads without re-uploading the file every time. Users can easily select the file from the "Attach Files" tab and it will appear in the query box of the currently opened chat. All images a user generates will also appear in this tab,
Clicking "Manage Files" opens a menu where users can search, sort and delete files that they have uploaded in CHAT. At this time users cannot re-download files from this section.
Parameters: Please note that this section's layout may change slightly depending on the provider used.
Parameters allow users to adjust the settings of any available model within CHAT. These settings include providing Custom Instructions, Max Context and Output tokens, temperature, Top P, etc. This is also the section where users can enable "Web Search" for a model when the created Parameter is selected. Hovering over any setting in the Parameters tab displays a further description of its function.
A list of all saved Parameter Presets can be found at the top of the Main Window between the Agent Selection menu and the Bookmark icon.
Users will need to enable the Parameter Preset any time they open a new chat.
User Account Menu
Click your name to bring up the Account Menu. This will allow you to log out of the CHAT tool, view all uploaded files, check your usage limits, and access or adjust your personal settings.
From the settings menu you can access archived chats, manage text and speech controls, as well as import conversations from other LLMs, such as ChatGPT, via a JSON file.
How to Create a Custom Agent
The Agent Builder lets users assemble Custom Agents by choosing a model, writing the agent’s system instructions, and configuring capabilities and integrations so the agent behaves exactly how you need. Custom Agents can also use CHAT tools and plug-ins (for example: Web Search and OpenAI Image Generation), which aren’t available to base models by default.
Steps to Creating an Agent
Before fully customizing an Agent we recommend users first create the foundation of their Agent. These selections can be changed at a later time if needed.
- Select the “Agent Builder” tab in the Features Panel on the right hand side of the screen.
- In the “Name” field, provide a name for your agent.
- Click “Select a model” under the Model field. Choose a provider and select a specific model. Once a model is selected click the green “Create” button.
- From here users can select their Custom Agent from the Model Selection Dropdown. Once an Agent is created, users gain access to enable the features of Agent Builder’s customization suite.
How to Enable Plug-Ins
- Select the “Agent Builder” tab in the Features Panel on the right hand side of the screen.
- Select the Custom Agent you would like to add the Plug-In to from the drop down menu.
- Under the “Tools + Actions” section click “Add Tools”. This will bring up a window that allows you to select the Plug-Ins your agent will use.
- Click “Create” at the bottom of the tab to enable the Plug-Ins for your Agent.
Note: Plug-Ins work across providers. For example, OpenAI Image Generation can work with a Google model selected.
How to Share an Agent
Once a user has created an agent, they can share it with other CHAT users. Please note, to share an agent, the user must have a CHAT account.
- After selecting your custom agent, at the bottom of the “Agent Builder” click the blue “Share” icon.
- In the “Share” menu, users can be added to the agent by searching for their UNI or email in the search bar. Additionally, users can be bulk uploaded by listing their email address.
- Added users by default will be made a “Viewer”, this can be manually changed to “Editor” or “Owner”
Viewer - Can view the Agent in the “Model Selection Menu”. Can not view agent settings or model used
Editor - Can view and modify the agent settings. Can not share the agent with other users.
Owner - Has full control over agent settings and the ability to share the agent with other users. Multiple users can be assigned the “Owner” role.
- Once a user is added or a role has been changed, click “Save Changes”
Once a user is added, the Agent will appear in their model selection menu after their next log in.
* CUIMC CHAT users can only have approved models shared with them (OpenAI)
Troubleshooting
If you experience any issues while using CHAT, please contact our support team at [email protected] for assistance.
In your email please include the following information:
- A description of what you were doing before the error occurred and the model used.
- A screenshot of the error message you received.
- A rough time frame of when the error occurred.